Monday, 24 March 2014

Miss Havisham Continuity Test & Final Images

OK! When designing and creating our Miss Havisham character, we had to bear in mind that we would be tested on continuity. 

Continuity is very important in the film and TV industry and shows the skills of the makeup and hair artist. A character must appear consistent in a film or TV series as not all scenes are filmed in one shot, meaning that the same hair and makeup must be repeated. 

For this continuity assessment, we had to create our Miss Havisham and recreate her again two weeks later. We are judged by placement of hair and makeup. 


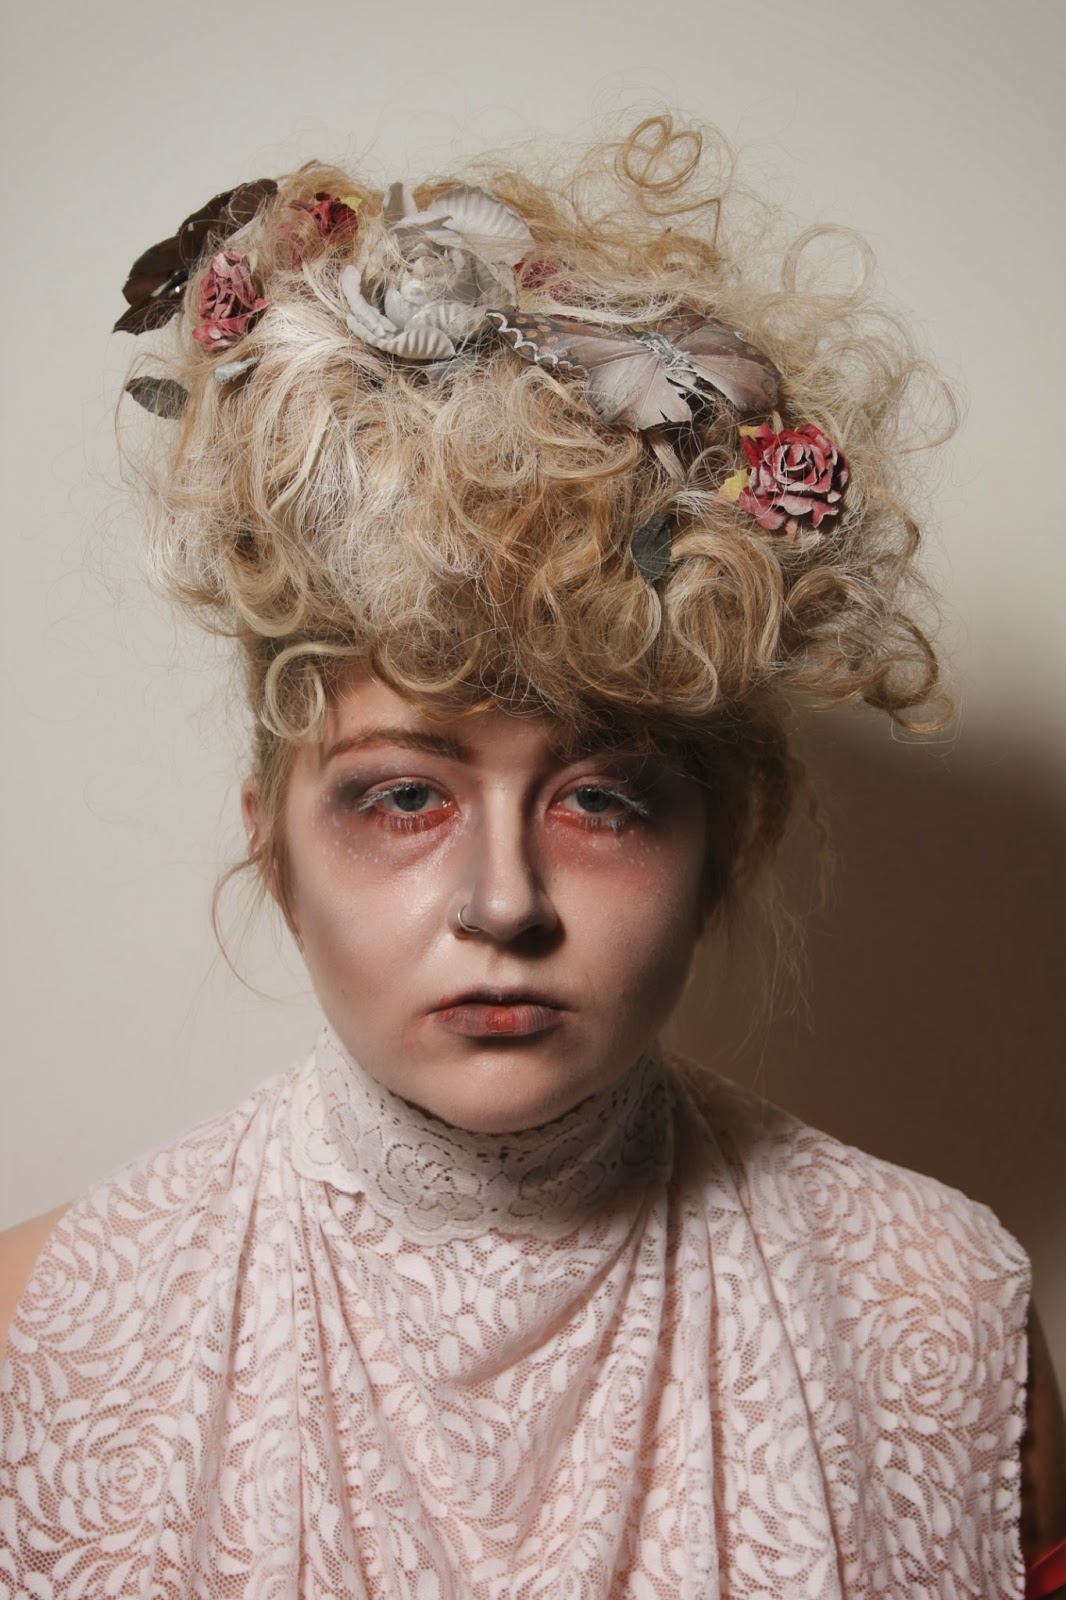
Havisham #1 


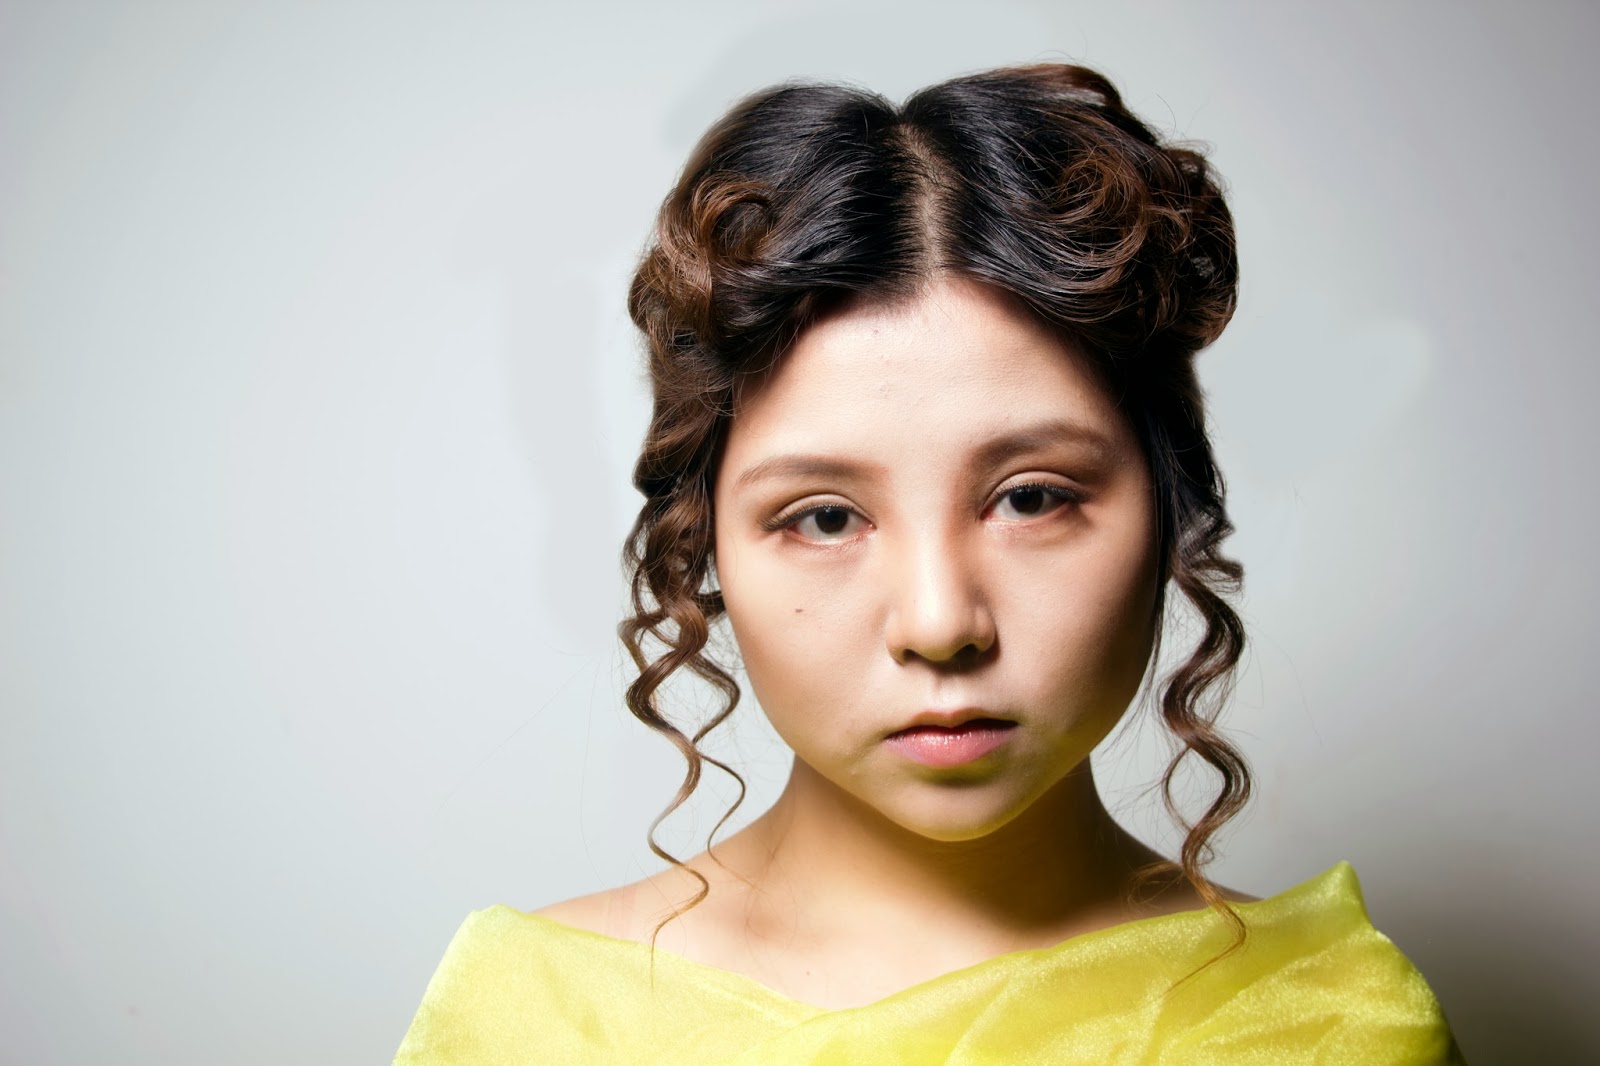
Havisham #2 


You can see there are slight differences in the photographs of Havisham 1 and Havisham 2. I am happy with the result as there is not too much difference. The lighting in the second shoot differed a tiny bit bringing up more red under the eyes. There are also tiny differences of the placement of the butterflies and flowers. Te contouring in the second shoot is also a little darker.

During the second time recreating my Miss Havisham, I made sure to refer to photos of the first creation and my face chart and hair charts. 


Thursday, 6 March 2014

Special Effects Makeup: Creating Burns

When creating burns, you can use a range of materials, however, you must consider the extent and type of burn you are creating. 

Remember that burns stay shiny and can be coloured around the edges. Burns always come from within to out. 

Here are a few examples of different types of burns: 

Mild acidic burn
Third degree burn
Blisters caused by burns
Materials that you will need to create burns: 

Tissue 
Latex 
Collodien 
Mastix Glue
Gelatine 

HEALTH AND SAFTEY 

You can combine all these materials together to build up your burn, however, if you are using Mastic glue, make sure that you have the remover, if you do not have the remover, do not use it as it will be very difficult to remove. 

If you are using latex, make sure your artist is not allergic to latex, you must do a test beforehand to make sure. Someone who is allergic to latex will get a reddish rash, if this happens, make sure to remove all of the latex immediately. 

Gelatin needs to be heated in order to achieve its runny consistency, the best way to do this is to heat the gelatine in a microwave. You can add materials into the gelatine, however, it is best to add the materials, such as glitter, afterwards. You cannot microwave any kind of metal substance. Make sure to not over heat the gelatin as it can become very hot very quickly, test before you apply to the artist. 

Gelatin is completely harmless. 

My attempt at creating a burn: 


To create the burn above, I followed the procedure below. 

1. Start with a clean surface. Cleanse and tone the skin. However do not moisturise as this might cause any latex, glue or collodien we will use later to slip off. To create a boundary between the makeup and the skin, apply derma shield

2. Rip apart layers of tissue. Tear into small pieces. Make sure all the sides of the tissue are jagged. 

3. Place the tissue to the area of skin. and apply collodien over the top generously. Wait to dry before building up the layers. You want to create edges, as though a hole has been burnt through the skin. You can crinkle the tissue to have a thicker layer on the edges of the burn. 

4. When the collodien is dry, you can tear the tissue to create burn holes on the wound with small tweezers, remember to be gentle, you don't want to hurt your artist or create too much of a hole. 

5. Colour the wound. I used the aqua palette from Kryolan, you want a mix of skin tones, deep reds, and charred blacks and greys. 

6. Go over the inside of the wound with a layer gelatine to create the shiny flesh effect. Once the gelatine is half set, you can play around with it by lifting the edges. Leave to dry. 

7. Add liquid blood and puss for a fleshier, newer burn or infected burn.

My Final Estella Havisham

Today I had to shoot my Estella. 
This is the outcome of that shoot. 

In the previous blogposts I showed my makeup and hair inspirations and intentions. 
However, I had to tweak both my hair and makeup designs a little. 


You can see in the photos above that the top of the head has less volume unlike my original design, however, I thought this was appropriate as it takes away more of the softness in the hair. I also forgot that the model had a fringe, therefore, I had to adjust the hair to incorporate it. I used a small curling iron to curl the fringe upwards to create a curtain effect and secured it with lots of hairspray.


Here is the back of the hair, you can see that it is pretty much the same as my initial idea and I love how the waves at the front merge into curls at the back and the reflection of light in this photo.


You can see in the image above that the hair does flare up and is a little wispy around the face. I could've avoided this with more uniform curls and hairspray.


Onto the makeup, I decided to keep the makeup very natural. I mainly focused on contouring and enhanced the eyes with shadow in the crease and corners and a pair of very natural false lashes. In my face chart that I created for Estella, the skin around the eyes had pink and red shades, however, pastel and light reds do not show up very well in black and white and as a result I decided to add contour to the eyes instead to add dimension. 


Overall, very happy with the outcome.

Wednesday, 5 March 2014

Exploring Estella: Beautifully heartless - Face

Makeup in the Victorian Era was very limited and also restricted. Victorian women were not allowed to wear makeup, so they focused more on skin care and the less they did on the face, the more they did to their hair. 

Estella is portrayed, through Pip's eyes, as a very beautiful woman. 
So, what was the definition of beauty in the Victorian Era? 
Here are a few examples: 

1. Fair Pale Skin 

Pale skin shows the status of a women, a woman with a tan shows that she is of a lower class and needs to work outside to survive. A rich and wealthy women was normally very pale. 


2. Eyelashes 

For as long as we know it, the eyes of a woman are very important. In the Victorian times, eyeliner and mascara and eyeshadow was unheard of. A man would be drawn to the freshness of a woman's eyes and long full natural lashes would've helped.


3. Small Rosy Lips 

If you look at a lot of Victorian paintings or illustrations, many of the women have very small dainty lips. 


So what cruel and cold elements can give Estella? 

You can spot a mean person a mile away, when I think of a cold hearted woman I think of: 

> Large beautiful eyes
> Thin arched eyebrows 
> Pointy nose 
> Sharp cheekbones 
> Thin lips with a strong cupids bow. 

For my final image of Estella, I will be shooting in black and white, this means that I will not need to focus on colour. Instead, I'm going to focus on the sculpting of the face i.e. contour. 

Apart from adding the beautiful and cruel elements that I have stated above, I am going to create the illusion of puffyness under the eyes, as I feel Estella suffers a lot from the 'training' Miss Havisham gives. 


Sunday, 23 February 2014

Exploring Estella: Beautifully Heartless - Hair

'hung upon Estella's beauty, hung upon her words, hung upon her gestures, and sat mumbling her own trembling fingers while she looked at her, as though she were devouring the beautiful creature she reared.' 
Adopted by Miss Havisham at a young age, Estella never gets an opportunity to find her own identity. Miss Havisham raises Estella as a deadly weapon to avenge her broken heart. Although we know that Estella is supposed to be very beautiful, she has no individualised physical presence within the novel, she is described through gestures and little physical detail. Estella therefore seems to be objectified, we are given the impression that Estella is a rather expensive and valuable possession rather than a human being.
Estella is often portrayed with jewellery.
“Miss Havisham watched us all the time, directed my attention to Estella's beauty, and made me notice the more by tying jewels on Estella's breast and hair"
The jewels enhance Estella 's beauty, like the jewels, Estella is beautiful, valuable and cold. 
So, when we think of Estella, how do we see her? What does she look like? 
Personally, I would describe Estella as:

Cold Manipulative Beautiful Sinister Expensive Trapped

My aim now is to create the perfect Estella which will portray all these characteristics. 

What would Estella's hair look like? 
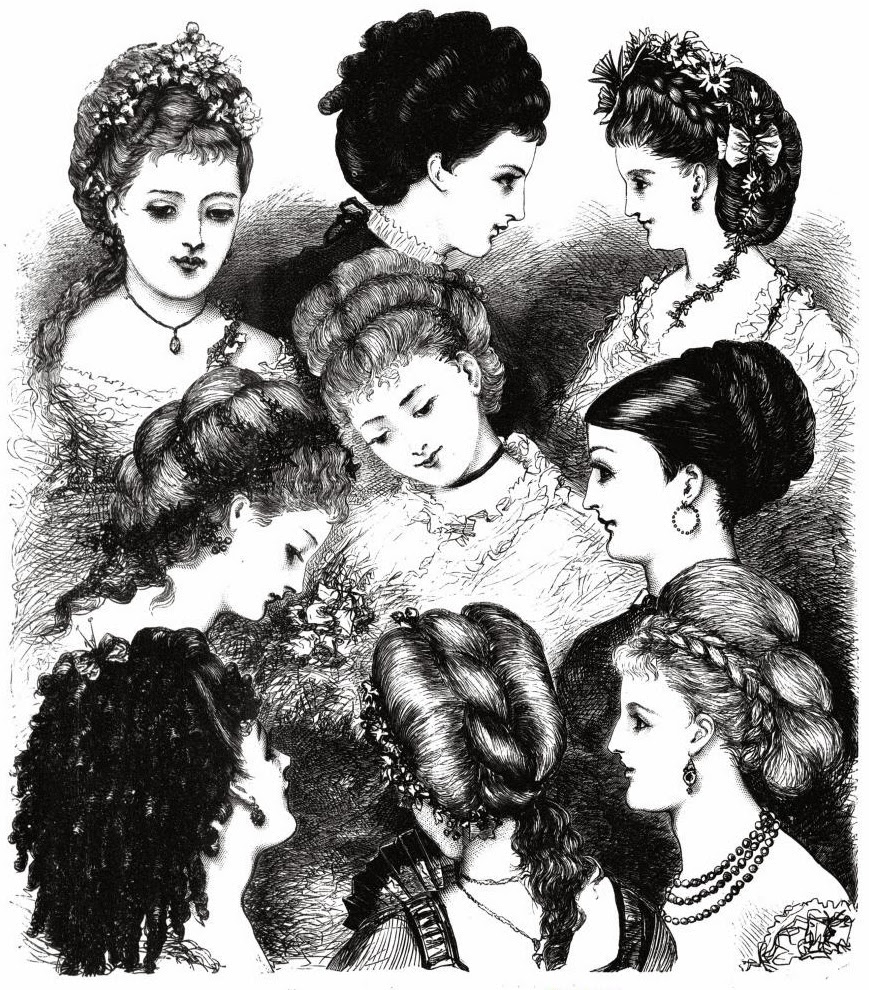


Available from: www.thevintagereader.com Last Accessed: 23 Feb 2014
Hair can say a lot about a person's character and personality. Loose curly hair can mean someone is gentle and romantic, whilst someone with dark hair in a tight up do may mean they are confident or older in age. 

A girl who wears her hair down, or in braids will appear more youthful and carefree. Whilst a girl with her hair up will appear more mature and restricted. The parting of the hair is also important, a middle parting was very popular in the Victorian era, however, a tight middle parting can appear harsh and create a cold character, especially on dark hair. On the other hand, no middle parting or side parting will bring softness into the hair. 

Estella's hair must be very beautiful, but also enhance her cold personality. 

The portrait above shows girls with very dark hair in a middle parting, the middle parting is pulled apart very tightly to the sides making her look cold and stern. I wouldn't say this was particularly very beautiful though, it adds age to her face.


I really like this image. The hair is very beautiful, and is quite romantic. However, it still contains cold features, the roses embellished on the side of the head have quite angular corners and could be symbolic of Estella being a rose with many thorns. Look at the loose waves, although they make her appear more youthful, the waves are very defined and separate and makes it less romantic. However, the volume on the top of the head is soft,  this contrasts with the hard elements and could symbolise Estella's soft spot for Pip. Hair with volume on the top of the head is also a great feature of Victorian hairstyles.
Could Estella's hair decor give her hair more character? For instance, the hair comb is very gothic and steampunk, the shapes and edges of it are very harsh and the sharp points appear deadly. 

For my Estella design. I decided to add a romantic aspect through pinned up curls and loose ringlets, this creates irony as well as appearing very beautiful.  Although the texture of the hair is very soft, I feel that there is still a strong shape and definite outline. I also feel that the middle parting takes away some of the softness.


I photographed the steps in achieving my Estella hair.
I curled all of the hair from the back of the ears onwards. The hair at the front has been curled to form a wave
and is left clipped up to set. 
Front
Using a fat scrunchie, I tied up the hair in a high ponytail.

The hair is pinned up to cover the scunchie and create texture and volume. Two ringlets are left hanging
on either side of the head.
Profile View
The clips are taken out and the curls are combed through to create waves and then pinned up with a strong middle part.
Profile View
Small roses are pinned on the side. (Estella a rose with many thorns)
Note to self: The flyaways need to be tamed.
Feathers are added to heighten the up do.

Improvements

I feel that the hair updo does not show portray Estellas cold and cruel personality enough. In order to add more cruel and cold elements I feel that I should create a higher shape. To achieve this, I need to tie the ponytail up higher on the head. I also feel that the middle parting needs to be a harsher and more pulled apart and the curls on either side of the head to appear more uniform. Overall, the hair needs to be tighter, smoother and sharper. 


Special Effects Makeup: Cuts & Wounds

Cuts and wounds have been revisited, this time, we played with collodien and tuplast. 

I have already written about creating cuts a couple of blogposts back so read back for a list of products that you will need to create cuts and wounds! 

This is what I have achieved during the practical: 

Here is a fresh cut on the cheek created with wax. You can also see that I have created a black eye as an additional effect. The cut looks dirty and patchy, vaseline has also been applied to the area to make it appear more swollen. 

Here is a closeup of the cut.

As a cut ages, the blood will start to thicken and dry and accumulate as scabbing, so above is my attempt at achieving this look, I mixed some 'dirt' with fake liquid blood and applied it onto the cut with a small brush.


This scarring on the lip is created with non flexible collodien. 

Using collodien (non - flexible) 

1. Make sure skin is clean, apply derma shield to the area you will be applying the collodien.

Note: Collodien is safe for the skin how ever, it is alcohol based, so it will have a stinging effect when applied to the face. Derma shield is a barrier cream which will create a barrier between makeup and the skin, offering some protection. Derma shield is much better as a barrier cream for special effects makeup because, although a moisturiser can act as a barrier cream, it is greasy, therefore, it is not recommended when using wax or latex as the products will not stick and may slip off. 

2. Apply the collodien to the area, avoid the eyes and delicate areas. 

3. Dry the collodien with a hairdryer. Make sure that you put it on low heat and a low setting and test it on yourself before using it on your subject. 

4. Once completely dry, add colour and contour if needed. 


Sunday, 16 February 2014

Havisham Hair Development & Silhouette

Above: Mood board of hair inspirations for Miss Havisham
Over the past couple of weeks, I have been practising the French pleat. The French pleat isn't a Victorian hairstyle, however, you can add many Victorian details. The picture below is my main inspiration for the silhouette:


After adding Victorian elements, I thought what I could do to the hair to add decay and eccentric elements to create the Miss Havisham character.


I was encouraged to create hair that would give a strong silhouette.


Remember the hair design that I created?


This is the silhouette I produced the second time I did the hair.


 You can see here that the hair has a strong shape but lacks the decay and eccentric elements. To resolve this problem, I added flower and a veil to add a more interesting silhouette.


I am happy with the final silhouette, the lace and ribbon contrasts with the strong structure and creates a romantic element, and I like fragile feeling the ringlets on the top give. 

I want to now experiment with more textures and accessories to add more contemporary elements whilst keeping it Victorian and adding more eccentric and decay features.