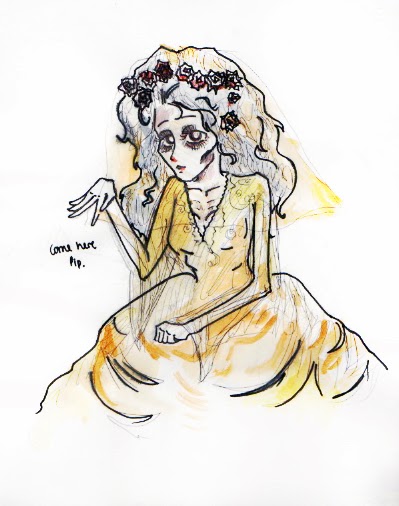
In the past week, we have been looking at various Victorian hairstyles and silhouettes in order to develop our ideas for Miss Havisham and Estella.
From the photos of Victorian portraits above, you can see that there are common aspects. We can see that the prominent middle parting is very popular, we can also see that the hair has a lot of volume at the top of the head or at the back. I have noticed that volume at the top of the head looks a lot more youthful, however, when the hair is pulled tightly back with volume at the back, a more mature shape is created. Victorian women normally had a lot of texture put into their hair such as waves, curls and ringlets.
Above are very interesting silhouettes of Victorian hairstyles and it is very inspiring to see the outlines of the shapes. I can now start to think about what shapes I want to create and what skill and materials I need to create it bearing in mind the effect that I want to create. I feel that the two women on the left look a lot sweeter and younger whilst the two women on the right look a older.
Here, we can see that a lot of texture and shape has been used to create this hairstyle. I love the use of feathers and jewels. This inspires me to look at objects I could use to create my hair for Miss Havisham. I could use a cobweb like texture, lace, jewels, and even insects and bone pieces to create a more unique look.
We can see here that lace has been used to decorate the hair and also act as a diffuser, this creates a mysterious effect as the person looking at the hair might have to look longer and deeper, paying more attention. This might mean that you can add a lot of intricate details that are not obvious and details that might shock the audience.
Last week we looked at the silhouette and shape of the classic french twist. We have advanced and are starting to look at ways in which we can alter it to create a potential hair design for Miss Havisham.
My aim was to create a french twist with a strong structure and a lot of volume and shape at the top of the head.
You can see that in the photo above I have tried to re-create the big rounded quiff-like structure at the top of the head. I was pleased with the french twist, however, I feel that the gap between the twist and the shape at the top of the head appears awkward and unfinished.
Above is a photo of the opposite side, you can see the detail of the twist, I have added loose curls on either side to create a softer look, however, I still feel that the hardness of the shape at the top of the head isn't fitting. It looks too smooth and tight, I feel that I need to add a lot more texture such as waves, crimps and curls to resolve this problem. I also think that it doesn't hang low enough onto the forehead.
Above, you can see that I have tried to improve the hair slightly by rearranging the twist so there is less of a gap in-between the 'quiff' and the french twist.
We were also encouraged to 'decay' the hair, creating a more Havisham piece, however, there was not enough time in the practical to do so further experimentation was done in my own time.
To begin with I tried to recreate and add to the shape that I created in class. As you can see, there is a lot of texture in the front piece. I created the front shape with a pre-curled synthetic wig and secured it onto the head. I am really happy with the shape.
This is the profile of the hair, I love the silhouette. I feel I have corrected the shape of the front piece and I also feel that it transitions well into the french twist instead of having the awkward gap in between when I first experimented. I have also added crimps to add a little texture on the sides as Victorian women often had sheep like textured hair.
Above is a photo of the hair from behind,I feel that since there is a lot of texture in the front of the head, the back should have less. I think the formation of the back looks romantic.
I then started to decay and take apart the hair, I backcombed and pulled out bits. I also sprayed dry shampoo at short proximity to some parts making the hair look grey, dry and dusty.
Above, is again the profile, again, I have added streaks of grey. The hair still looks structured but still contains an element of decay. The french twist has unfolded and curls have dropped and I had left them hanging.
The back of the hair now looks very dusty, I love the softness I have created when trying to decay the hair, it is romantic, which can imply that once, Miss Havisham must have been very beautiful.
I now feel that I need to find ways to accessorise the hair to add more detail and character. I find Miss Havisham's hair from the Helena Bonham version very inspiring as there is so much detail in which the eye can explore.


